Painting Flowers: 5 Step-by-Step Watercolor Techniques

Sharply lit and set against a dark background, Birgit O’Connor’s watercolor flowers are anything but sweet. “I usually don’t paint the garden variety of flowers; I like the unusual. If the flower isn’t sweet, the color can’t be wishy-washy.” Follow along as O’Connor demonstrates five flower-painting watercolor techniques. In these watercolor tutorials, she’ll show you step by step her processes for painting a variety of watercolor flowers.
5 Watercolor Flower Painting Demos

1. When painting small watercolor flowers like pansies, it’s natural to want to clump the small flowers together and make a bouquet. Instead, try treating the pansy as you would any other flower: Focus on shape, shadow and color to create a bold composition.

2. Painting flowers with red can be tricky because in order to retain its vibrancy you have to keep the color fresh and clean. Working wet-into-wet, I make sure to have a lot of paint on my brush, and then apply color in swift, sweeping strokes of color.

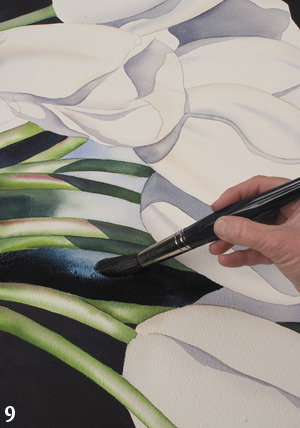
3. The key to painting a white flower in watercolor is to keep it simple. Generally there’s enough color in your wash bucket to break up the stark white of the paper; a little bit of additional color may be all you need to imply the petal’s shape. Another general rule is to always apply water first and then color.

4. When painting a flower that has more than one stamen, try not to get caught up in every detail. To save the whites of the stamens, you can either use masking fluid or work with the negative space surrounding the lightest stamen, which is my preference. Masking fluid can leave harsh lines when removed from the surface. Working with the negative space, on the other hand, creates softer edges and results in more lifelike flowers.
.

5. Water drops on your watercolor flowers can add to the sense of realism; just be careful not to overdo it as the look can quickly become cheesy. One of the secrets to realistic water drops can be found in the shadows. Before adding the shadow allow the drop to dry completely dry or the color can bleed back in. You want a nice crisp line, tapering up the side to define the edge. To finish, lift some color out of the shadow. This helps to show light refracting through the drop.
These demonstrations are excerpted from Birgit O’Connor’s book Watercolor in Motion (North Light Books, 2008). The demonstration also appeared in O’Connor’s article “Fancy Flowers” in the March 2008 issue of The Artist’s Magazine.
Watch a free preview of “Watercolor Essentials with Birgit O’Connor,” a video from artistsnetwork.tv.


Have a technical question?
Contact UsJoin the Conversation!