Creating a Landscape With a Palette Knife Demonstration

The following palette knife demonstration is brought to you by The Artist’s Magazine. Get the complete issue feature Deborah Quinn-Munson, or click here to subscribe to The Artist’s Magazine.
Using a Palette Knife for an Oil Landscape Painting
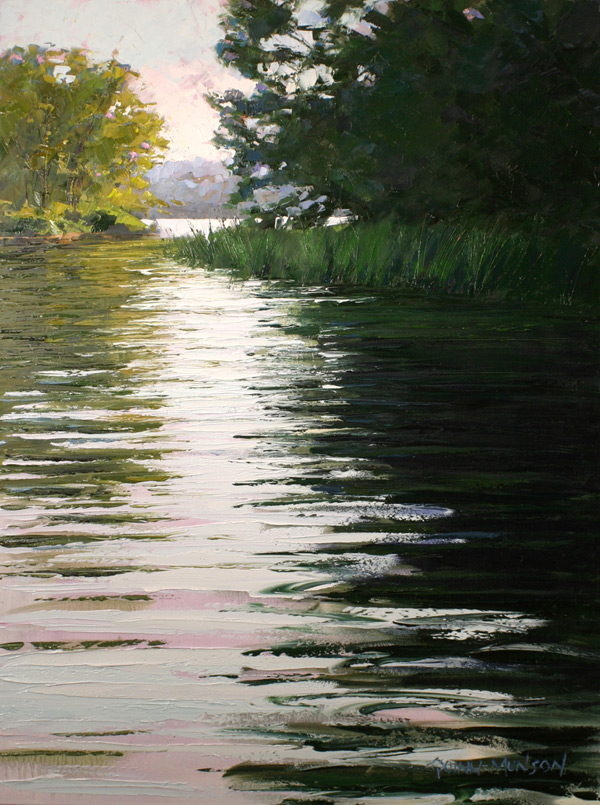
“My painting style is representational with emphasis on a strong abstract structure, contrasting values and bold paint application resulting in a painting that’s both confident and peaceful,” says Deborah Quinn-Munson. Keep reading for a demonstration on how she creates a storyboard. Learn how to use a palette knife for an oil painting in this step-by-step of River Bend (below).

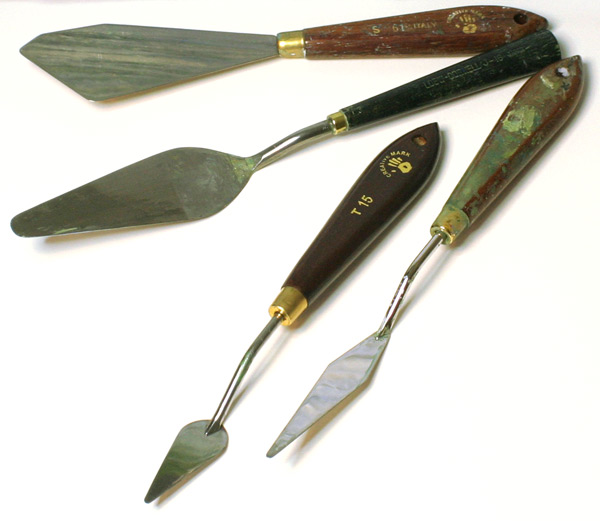
Materials: Palette Knife Examples

The palette knives I use are wedge shaped and vary in size from approximately 1 to 4 inches in length. At times in the oil painting process I am applying paint in broad sweeps with the larger knives and other times the detail of the point or a smaller knife is necessary.

My palette is a piece of glass, 12×24, placed over white mat board, with colors arranged as follows: beginning in the lower left corner Permalba White, Hansa yellow light, raw sienna, burnt sienna, Van Dyke Brown, alizarin crimson, quinacridone red, ultramarine blue, phthalo blue and sap green. (I am hardly a neat and tidy painter and sometimes add a drop of paint out of place such as the yellow pictured here.)
The first three mixtures shown from left to right are white, phthalo blue and quinacridone red, white, phthalo blue and ultramarine blue, white, ultramarine blue and a bit of burnt sienna. The two dark mixtures on the right contain slightly different amounts of ultramarine blue, phthalo blue and a touch of either quinacridone red or burnt sienna.

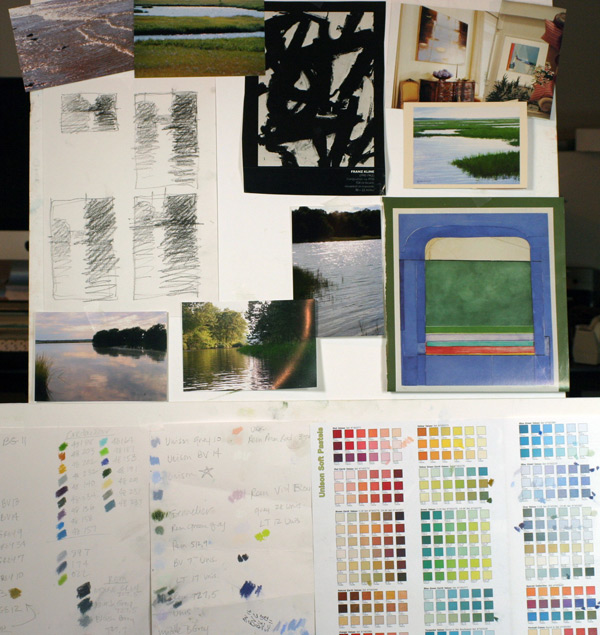
The storyboard, as I refer to it, is a collection of sketches, photographs, clippings, color charts and whatever I find that inspires me and will give me clues to the finished piece. Sketches and photos are helpful for composition. Clippings of a painting such as Franz Kline remind me to stay free and bold with paint application and Richard Diebenkorn’s painting image, among others, gives me some color reference.
How to Use a Palette Knife for Oil Painting: The Process

Once the composition has been determined, oil paint, thinned with Gamsol paint thinner, is applied to Ampersand Gessobord. Values and colors begin to take shape at this stage.

Above: A close up of the oil under-painting conveys the loose brushwork at this stage and the drips and runs of the paint, some of which will be visible in the final piece.
.

The second application of thin oil paint completes the under-painting. Values have been enhanced and color continues to emerge.
.

Over the dry under-painting, oil paint (not thinned) is applied with a palette knife. Many shades of green mixed with sap green, ultramarine blue and Van Dyke Brown make up the dark area on the right. The light area of sky and water is a mixture of white and a bit of quinacridone red and phthalo blue. The challenge is to keep the palette knife strokes clean and deliberate as the dark and light areas blend.
.

Dark green paint was applied in horizontal strokes with a palette knife. Light violet paint was applied in the same manner. The palette knife is wiped clean after each stroke where the light and dark paint meet. A few choice swirl marks are made to enhance the illusion of water.
.

Raw sienna and Hansa yellow light is added to the green mixture to create the reflection of the trees on the left. Marks of the palette knife are kept horizontal in this area to create the illusion of the water surface. Some of the oil wash can be seen through the thick paint made by the palette knife.
.

The close-up of the completed image illustrates the range of marks the palette knife can create, from flat areas in the distant water to the sharp points of sea grass.


Have a technical question?
Contact UsJoin the Conversation!