6 Pastel Painting Tips — Feather Dusters Will Be Involved

There’s a Pastel Hack for That
Whatever pastel problem is giving you grief, chances are, many other painters have been there, too. That means there are solutions already out there that can help. Here, you’ll discover proven pastel painting tips featured in Pastel Journal and hacks that can simplify some common painting problems. Enjoy!

A Pastel Painter Walks Into a Bar
Oh, the things you can learn while sitting at a bar, especially when your comrades are pastel artists. At the last convention of the International Association of Pastel Societies, I found out that the hotel bar was an especially good spot for artistic enlightenment. Pastel artists, I’ve discovered, are among the most generous people I’ve ever known. They openly share their best tips and tricks with fellow artists at conventions, at workshops — wherever they go. When one artist shares a problem or dilemma — boom! — another pipes up to offer a possible solution. I think I learned as much over margaritas at the Hotel Albuquerque as I did in my workshops (and I learned a lot in the workshops!). But sometimes it’s those small, simple tricks that end up making the greatest impact on our art-making. Thus, the idea for this story was born — an open exchange of proven pastel painting tips and hacks to enhance your pastel practice.
#1 Packing Tip for Unframed Pastels
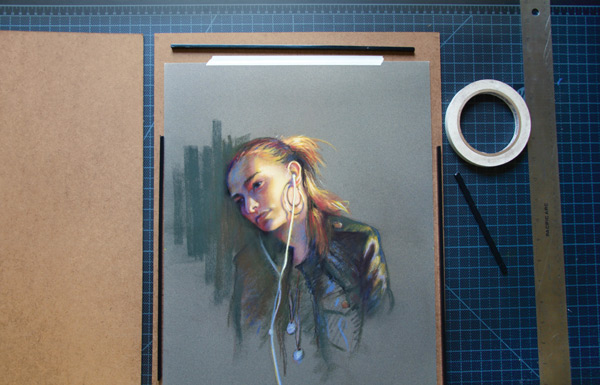
You’ve just attended a wonderful pastel workshop in Tuscany. You want to make sure the work you created on this trip-of-a-lifetime gets home safely. How to protect unframed pastels during travel is a common worry. Covering the work with sheets of glassine paper and then sandwiching them between boards is standard practice. But artist Christine Swann shared this “hack” using spacers and duct tape. “Glassine is one option, but during transport it can easily rub across your painting,” says Swann. “A good alternative is to tape a painting onto a hard board, such as Masonite or Gator Board, using artist’s tape. The board should be a little bigger than the painting. Mount spacers, used in framing, to surround the image. The spacers have an adhesive backing that’s easy to pull off and affi x. Using a second board that’s cut to the same size as the fi rst, sandwich the painting safely inside. Secure the two boards with duct tape. Now your painting is ready for transport.”

#2 Handy-Dandy Pastel Cleaner
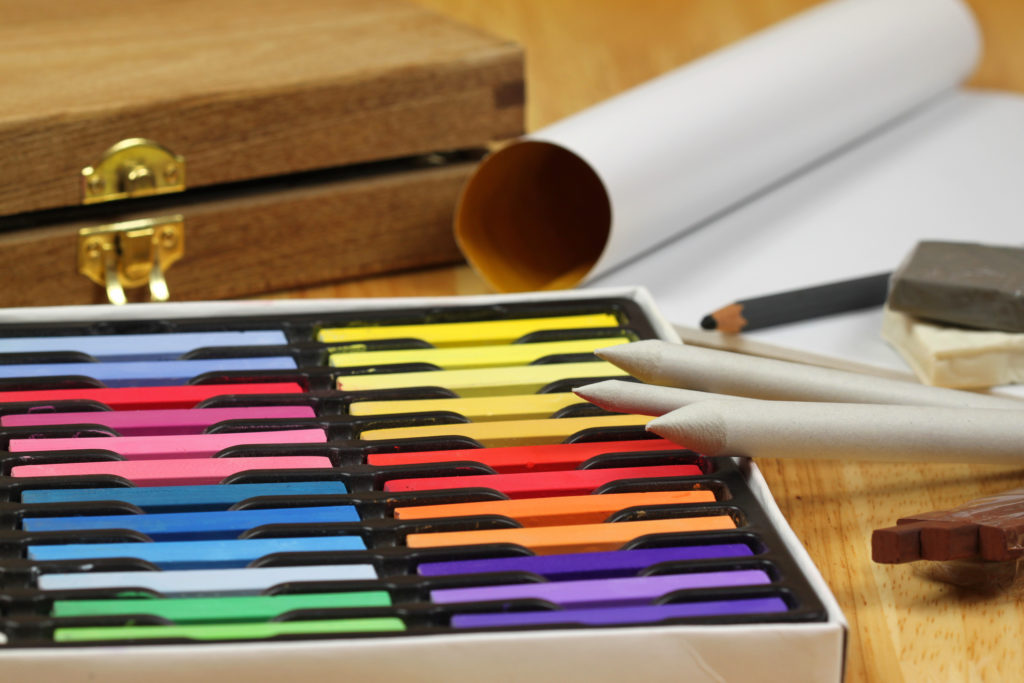
Marla Baggetta is constantly on the road with her pastel sticks, teaching workshops or painting en plein air. She has gathered up a lot of pastel painting tips to share. The secret to keeping her traveling box of pastels clean? A feather duster. “When I’m on the road, I bring along a feather duster in a tube and use it to lightly dust my pastel sticks,” she says. “Just make sure you do this outside and watch the wind direction, because it can kick up a bit of pastel dust. These dusters also make great party favors for all your pastel friends!” Baggetta attributes this pastel painting tip to her friend, Jude Galbraith, who shared it with her.

See for yourself how a feather duster really does help keep your pastels neat and clean and free from unwanted colors specking them!
#3 Pastel Painting Tips for Staying “Sharp” In and Out of the Studio
I like to draw with Nupastels and pastel pencils, which are also great for adding fine lines and details. How best to keep them sharpened, though, is an oft-debated pastel painting tips subject on artists’ social media pages. I use a single-edge razor blade to sharpen new sticks and pencils. After the initial sharpening, I was using a sandpaper block to keep the point sharp. Unfortunately it’s messy and the block doesn’t last very long. Then I discovered drywall sanding screen. It does a great job of sharpening my Nupastels, pastel pencils, charcoal sticks and graphite pencils. It’s inexpensive, lasts a really long time, and is available at the local hardware store. I’ve made two versions—one for the studio and one for travel.

Two Tips in One
For the studio, I repurposed a shallow wood tray that’s about 9×4 inches. The sanding screen is 4¼ x 11¼ inches, so anything smaller than that will work. I used wire cutters to cut two pieces of screen, leaving the middle open (so it’s easy to empty the dust). I left a lip around the outer edge that could be folded over the box. Finally, I secured it with duct tape. The sanding screen will last a long time; the one I’m using now has been going strong for over a year. For travel, I repurposed an Altoids mints tin. I created a template of the opening, plus the depth of the tin, so that the screen could be folded down and tucked inside the tin. It’s important that the portion that’s folded down is the same as the depth of the tin. This prevents the screen from being pushed downward when sharpening sticks. To make it easier to fold, I clipped the corners with the wire cutter. You may want to use gloves when doing this part, as the screen is rough on your hands. This smaller-sized tin is especially convenient for travel because the lid can be closed to contain the dust. Even so, I do keep the tin in a zippered plastic sandwich bag to be safe.
#4 Pocket Palette
An Altoids tin can also be repurposed for many other handy travel needs. Using half-pan watercolors, I created a small portable watercolor palette for underpaintings. I used the lid for a color legend and adhesive dots to secure the half pan holders to the bottom of the tin. A piece of watercolor paper and rubber cloth, cut to fit, make for a great barrier, blotter and place to mix colors.

#5 Need Color Ideas? Take a Trip to the Hardware Store
Because handling color is central to a successful pastel, every developing painter wants to gain color confidence. “I’m a big believer in planning for color harmony in a painting,” says Swann. “It can unify a piece. And, when colors ‘sing,’ it can create a specific mood. But how to get started? Sometimes just sitting with a nice cup of tea and flipping through the pages of your art books can inspire ideas for color harmonies. This is one of the reasons I think of my many art books as my ‘friends in the studio.’ I have a bunch. If you’re an artist, you probably do, too.” Another source for color inspiration is the hardware store paint aisle. “I’ve collected hundreds of color paint chips over the years,” says Swann. “They remind me to consider all the variations of a color—not just the brightest version of a color, but the whole range of neutralized and subtle hues as well.”

#6 Maximize Every Square Inch
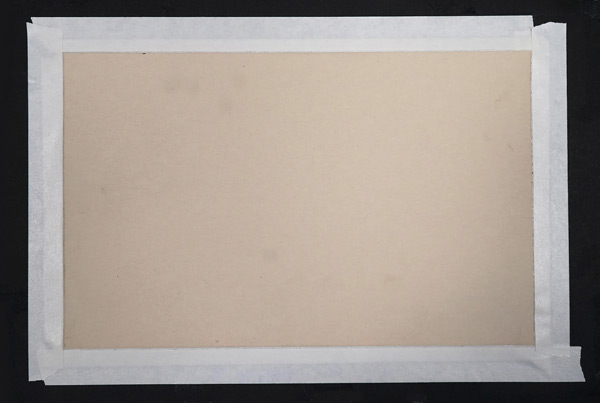
Alain Picard shares many interesting pastel painting tips and tricks with his workshop participants, including a technique for taping unmounted paper to board, which he calls the “tape-to-tape” method. “When I’m working on a piece of unmounted sanded pastel paper, such as UART 400 or 500,” Picard says, “I’ve developed a way of taping the paper securely that maximizes the working surface of my sanded paper while also stretching it nice and tight to allow free application of underpainting washes and bold painting without any buckling. I use Pro Art archival artist’s tape in either white or black. I typically use the 1-inch thickness, but ½- or ¾-inch would work fine as well.”

Alain continues: “First, turn the paper over so it’s face down. Apply tape around all four sides, with 50 percent of the tape hanging off the edge of the paper. Then, turn the paper over, revealing a visible layer of adhesive tape around the entire perimeter of the sanded paper, which has not yet been adhered to the backing board. You can now apply another layer of tape to secure the paper to the backing board all the way around the edge, this time covering only the exposed tape layer, and making sure not to overlap any of the sanded paper. This will allow you to work freely on 100 percent of your full sheet of sanded paper while having a very secure working surface. The paper can now be safely secured to your backing board.” This article on pastel painting tips and hacks was written by Lisa Rico.
Pastel Trio
Love pastel? Us too! Enjoy this trio of videos on this favorite medium and discover so much more to love about the art you can make with pastels in hand! Discover the power of a horizon line and just what to do with it color-wise in this pastel tips video.
Want to know a few tips and tricks for working with pastels? We’ve got them right here in these two back-to-back videos!


Great hacks…never thought of any of them.
Wonderful tips thankyou